Add Your First Source
Pulse ingests newsletters through email forwarding. The recommended path is a Gmail filter that automatically tags and forwards newsletters to your personal Pulse address.
Option 1 — Gmail auto-forward filter (recommended)
Section titled “Option 1 — Gmail auto-forward filter (recommended)”Step 1 — Find your personal ingest address
Section titled “Step 1 — Find your personal ingest address”Open Pulse Settings and copy your auto-forwarding address. Every email sent to this address is attributed to your account, regardless of the original sender.
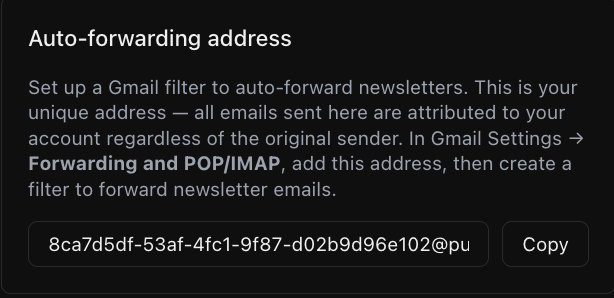
Keep this address private — it’s tied to your account.
Step 2 — Create the newsletter filter in Gmail
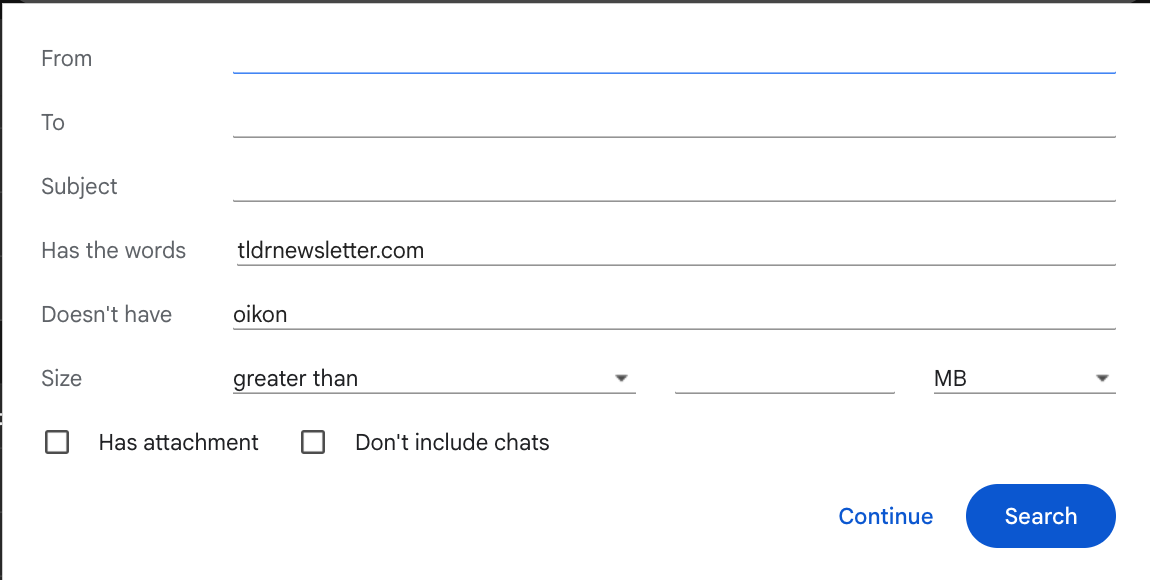
Section titled “Step 2 — Create the newsletter filter in Gmail”In Gmail, go to Settings → See all settings → Filters and Blocked Addresses → Create a new filter.
Fill in the criteria:
- Has the words — enter the newsletter’s sending domain, e.g.
tldrnewsletter.com. You can add multiple domains separated by spaces orOR. - Doesn’t have — enter
oikonto prevent Pulse’s own emails from being re-matched by this filter.
Click Continue.
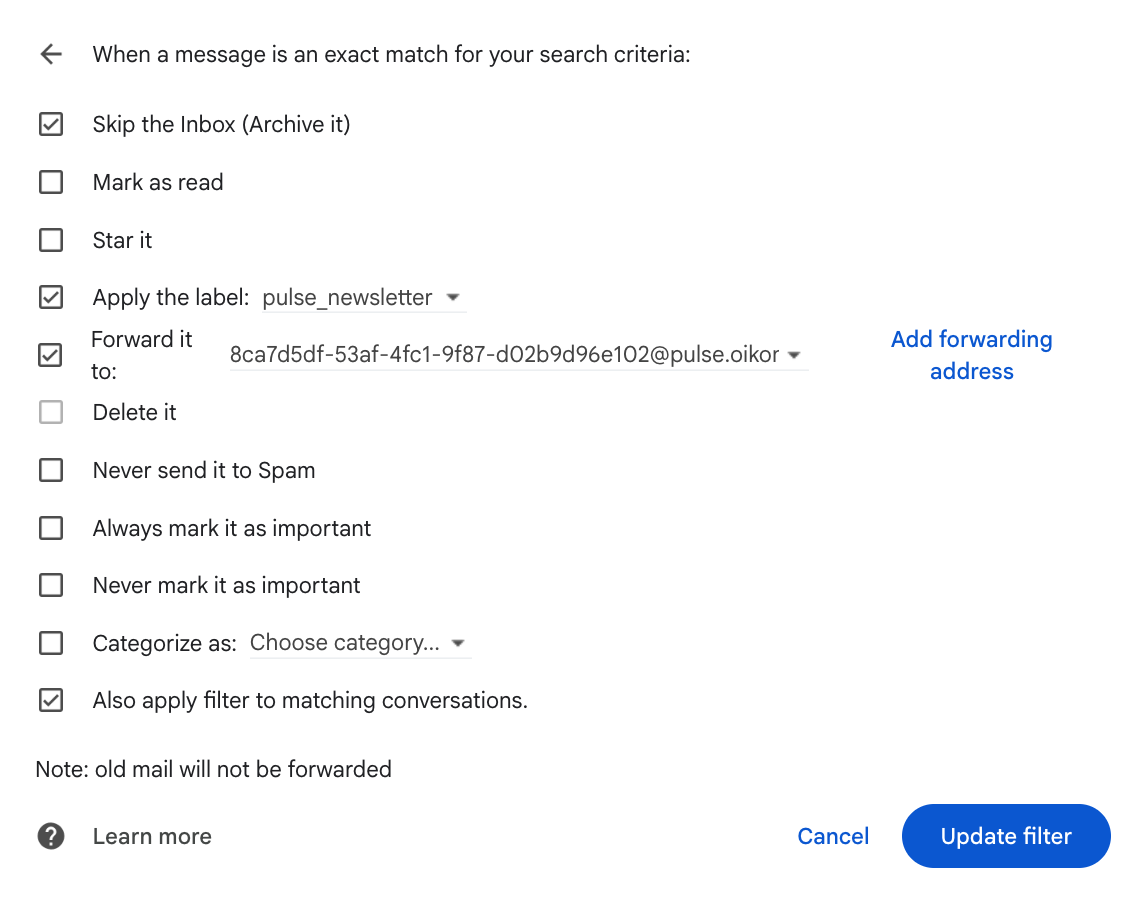
Set the filter actions:
- Check Skip the Inbox (Archive it) — keeps newsletters out of your main inbox
- Check Apply the label and select (or create)
pulse_newsletter - Check Forward it to and choose your Pulse address from the dropdown
- Check Also apply filter to matching conversations — this retroactively tags existing newsletters so they’ll show up in a Google Takeout export
Click Create filter (or Update filter if editing an existing one).
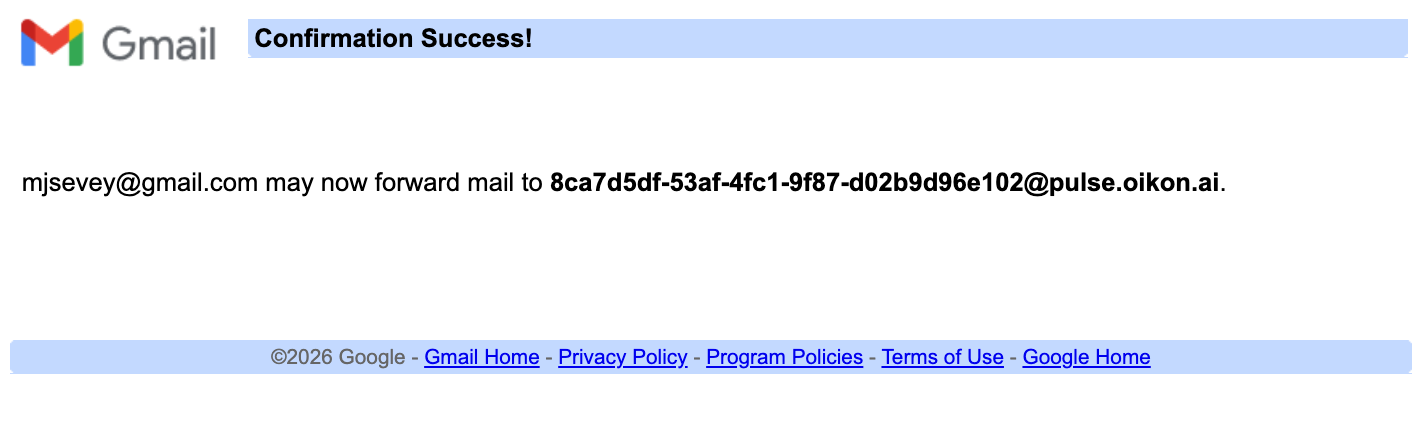
Step 3 — Confirm the Gmail forwarding address
Section titled “Step 3 — Confirm the Gmail forwarding address”The first time you forward to a new Pulse address, Gmail requires a one-time verification. Pulse automatically sends you a confirmation email — look for it in your Gmail inbox.

Click Confirm Gmail forwarding → in the email. You’ll be taken to a Gmail confirmation page — click Confirm.
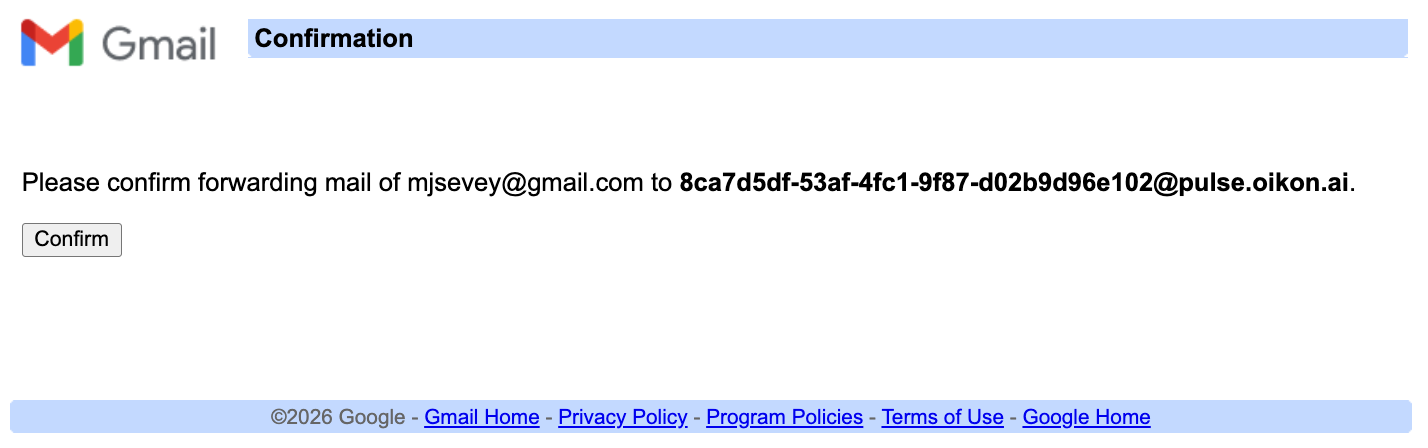
You’ll see a success message confirming that forwarding is active.
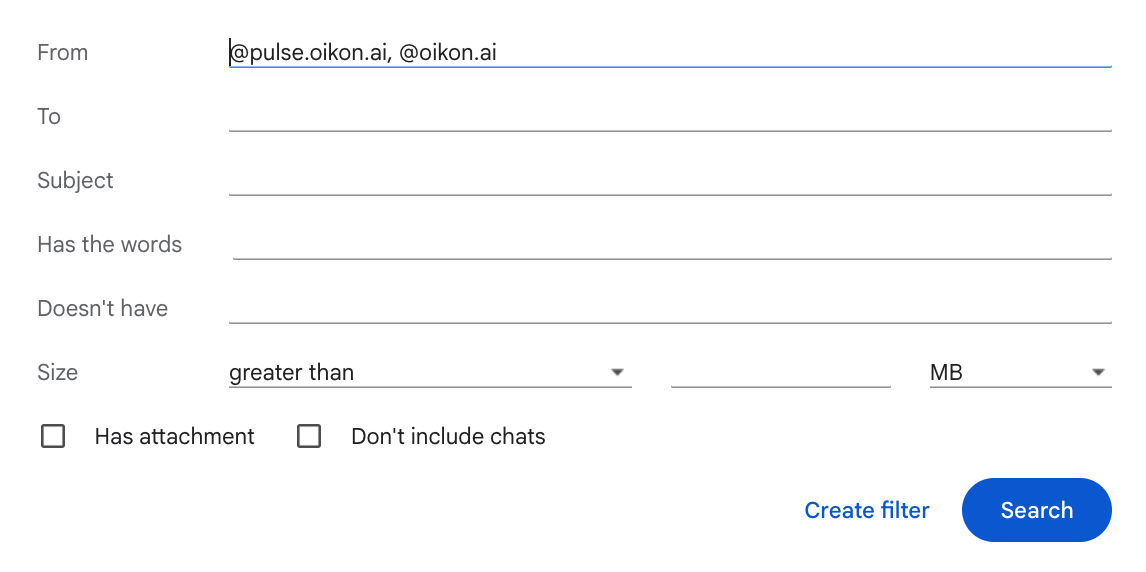
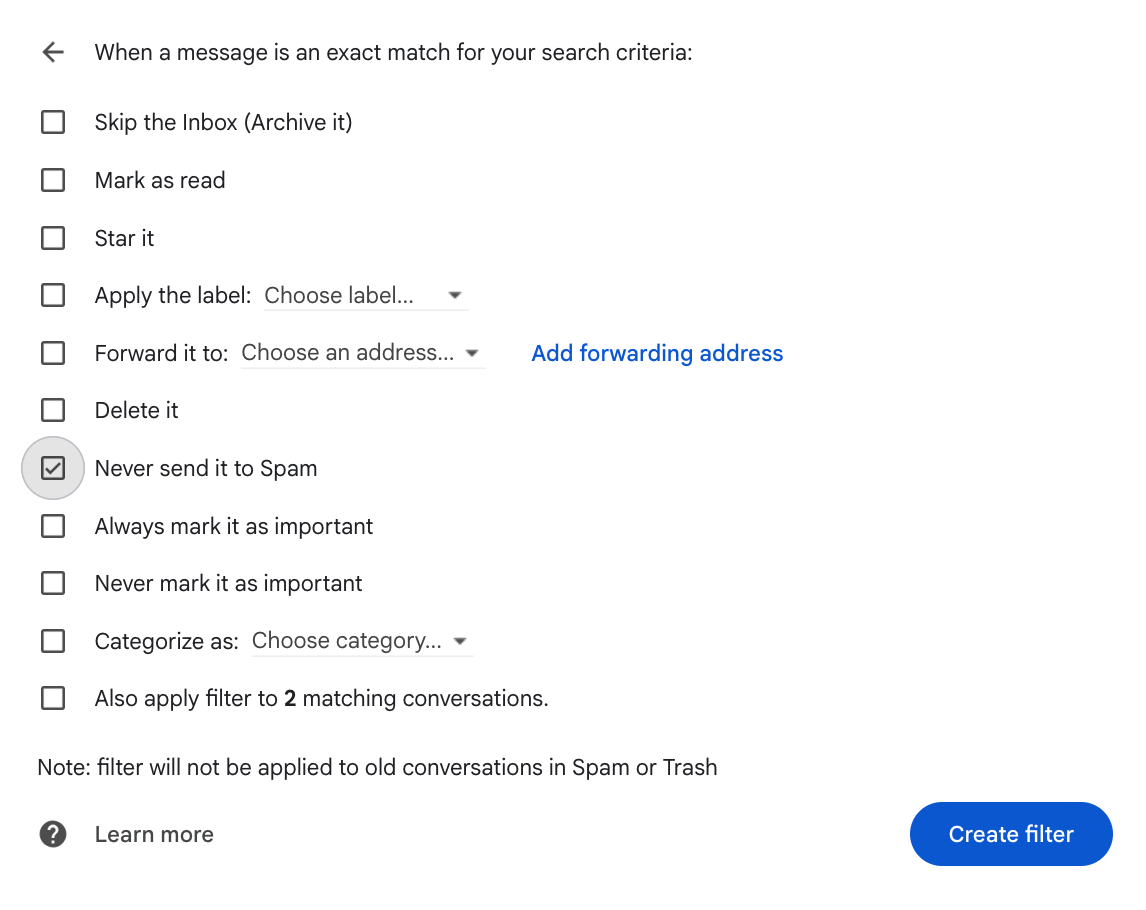
Step 4 — Prevent Pulse emails from going to spam
Section titled “Step 4 — Prevent Pulse emails from going to spam”Create one more filter so Gmail never routes Pulse emails to your spam folder. In Gmail, create a new filter with:
- From:
@pulse.oikon.ai, @oikon.ai
Click Create filter and check Never send it to Spam.
You only need to do this once — it covers all Pulse addresses.
Adding more newsletters
Section titled “Adding more newsletters”Repeat Step 2 for each newsletter, adding its sending domain to the Has the words field. You can also edit the existing filter and add domains using OR (e.g. tldrnewsletter.com OR morningbrew.com). The forwarding and spam filters don’t need to be repeated.
Option 2 — Manual forward
Section titled “Option 2 — Manual forward”For a one-off email, forward it to ingest@pulse.oikon.ai from your registered email address. Pulse identifies you by your From: address.

Option 3 — MBOX archive import (Gmail)
Section titled “Option 3 — MBOX archive import (Gmail)”Import years of newsletter history in one step using Google Takeout.
See the full walkthrough: Import Your Gmail Archive →
What happens after ingestion
Section titled “What happens after ingestion”Once an email is ingested:
- Pulse extracts the article text and identifies the source newsletter
- The LLM pipeline tags the content, extracts entities, and scores relevance
- The content becomes available for your next digest
Next steps
Section titled “Next steps”- Daily Digest — understand how digests are assembled
- Sources — manage and configure your sources